I am three months into being a new mum and have finally found some time to do some crafty projects. The first being a DIY Mobile for Harry's nursery. We chose to have curtains in the Harlequin Distant Shores (see below) and so thought it would be nice to pick elements out the design to make into a mobile to hang above his cot.
It was the first time I had made a mobile and I am really pleased with how it came out, I think Harry is too, so I thought I would share how I created it with you all.
The Balloons:
1. Draw a template in cardboard of your hot air balloon and use to cut out the shape in five different coloured cards.
2. Take each of the five balloon cut outs and fold exactly in half.
3. Take the first folded cut out (in the this case the yellow one) and apply double sided tape to one side.
4. Now cut the tape to fit the balloon shape
5. Peel off the backing on the tape and stick to another of the folded balloon cut outs (in this case the blue one) as below
6. Repeat steps 3-5 with the next cutout (this time red) and stick this to the blue cut out.
7. Repeat steps 3-5 with the next cutout (this time green) and stick this to the yellow cut out.
7. Repeat steps 3-5 with the next cutout (this time orange) and stick this to the green cut out.
8. To finish the 3D balloon, apply double sided tape to the orange cut out and attach to the opposite blue cut out
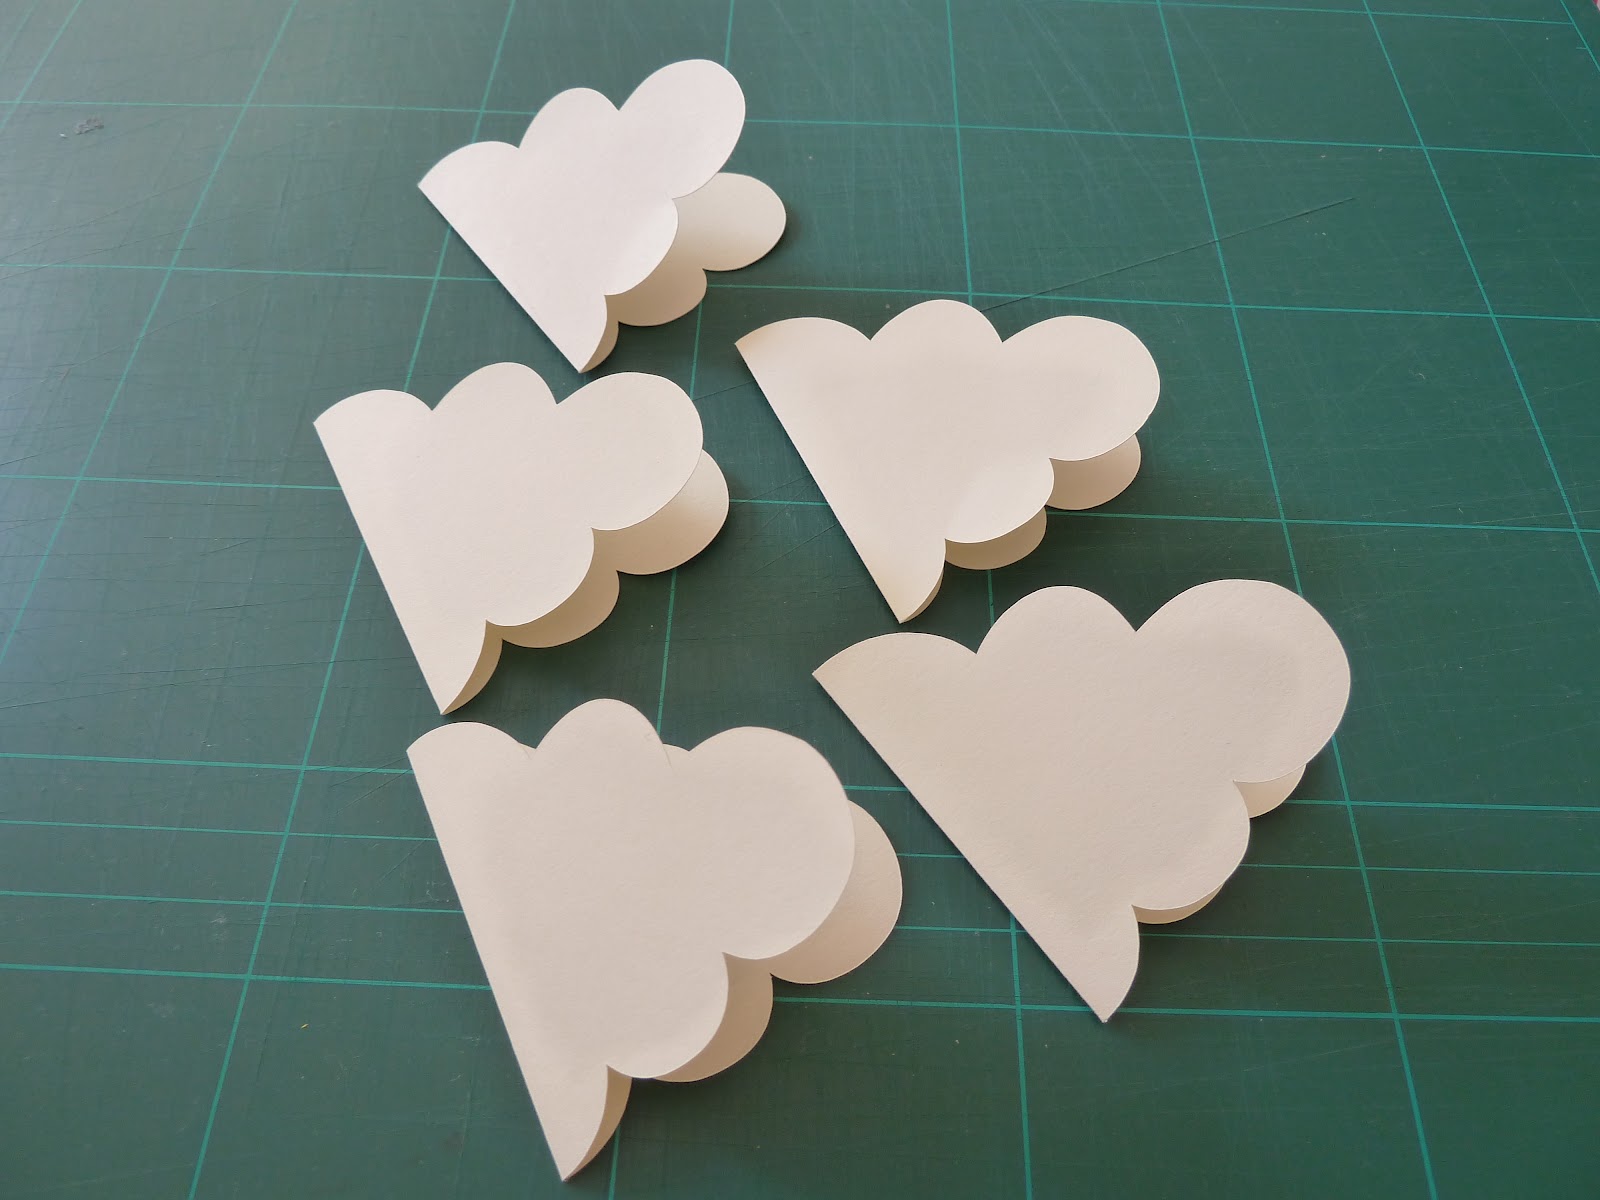
The Clouds:
1. Create a template for the cloud in card and use to cut out five cloud shapes out of cream or white card.
2. fold all five of the cloud cut outs in half
3. Attach double sided tape to one side of each (as with the balloons) and stick each to another cut out until you have stuck them all together to form a perfect 3D cloud shape.
As you can see from the original photo I also created a Red London Bus, a Blue Campervan and Grey Elephant to go on the mobile but you can add what ever shapes fit with your little ones room.

I used the inside of an embroidery hoop and attached 4 pieces of red ribbon, equal distance around the hoop, for the top. The mobile elements are attached using invisible thread that you can buy from most craft stores.
I hope you enjoy trying to make your own mobile as much I did. Happy crafting!